Oster 22 Quart Roaster Oven Instruction Manual: A Comprehensive Guide
This manual provides detailed guidance for your Oster 22-quart roaster oven, including setup, operation, cooking, cleaning, and troubleshooting.
Resources like the Internet Archive offer downloadable manuals, such as the Oster CKSTRS23-SB instruction manual, for further assistance.
Welcome to the versatility of the Oster 22-quart roaster oven! This appliance is designed to expand your cooking capabilities beyond the traditional oven, offering a convenient solution for roasting, baking, and slow cooking. Whether you’re preparing a holiday feast or a simple weeknight meal, this roaster oven provides ample space and consistent heating.
The Oster roaster oven is a popular choice for those needing extra oven capacity, especially during peak cooking times; Resources like the Internet Archive host user manuals – including those for smoker/roaster combinations – offering valuable insights into operation and maintenance. These manuals, such as the Oster CKSTRS23-SB guide, detail features and provide guidance for optimal performance.
This guide will walk you through every aspect of using your Oster 22-quart roaster oven, ensuring delicious results and years of reliable service. Explore the possibilities and enjoy the convenience!
Understanding Your Roaster Oven – Model Numbers & Variations
Oster offers several variations of the 22-quart roaster oven, often distinguished by subtle differences in features and model numbers. Common models include those with standard or self-basting capabilities; Identifying your specific model number – typically found on a label located on the appliance’s base or back – is crucial for accessing the correct support materials.
The Internet Archive provides access to a range of Oster manuals, including those for smoker/roaster combinations, which can be helpful for understanding related features. The Oster CKSTRS23-SB is one example of a specific model with a dedicated instruction manual available online.
Variations may include differences in control panel design, included accessories, and exterior finishes. Always refer to the manual specific to your model number for accurate instructions and safety information.
Safety Precautions & Important Warnings
Prioritize safety when operating your Oster 22-quart roaster oven. Always ensure the appliance is properly grounded to prevent electrical shock. Never immerse the roaster oven, cord, or plug in water or other liquids. Hot surfaces pose a burn risk; use oven mitts or pot holders when handling the roasting pan or oven itself.
Avoid operating the appliance with a damaged cord or plug. Do not leave the roaster oven unattended during operation. Keep it away from flammable materials. Ensure adequate ventilation during use.
Refer to your specific model’s instruction manual – resources like the Internet Archive offer downloadable versions – for a complete list of safety precautions and warnings. Ignoring these guidelines could result in injury or damage to the appliance.
Setting Up Your Roaster Oven
Preparing your Oster 22-quart roaster oven for initial use is straightforward. Begin by carefully removing all packaging materials and inspecting the unit for any damage. Locate the roasting pan, rack, and lid – these are essential components. Ensure all parts are present and in good condition.
Before first use, wash the roasting pan and rack with warm, soapy water, then dry thoroughly. Familiarize yourself with the control panel, noting the temperature settings and timer functions. Consult your instruction manual – downloadable resources are available on sites like the Internet Archive – for a detailed diagram.
Proper setup ensures optimal performance and longevity of your roaster oven.
Initial Inspection & Cleaning
A thorough initial inspection of your Oster 22-quart roaster oven is crucial before first use. Carefully examine the exterior for any shipping damage, dents, or scratches. Check the power cord for fraying or cuts; do not use if damaged. Open the lid and inspect the interior for loose parts or debris.
Cleaning before the first use removes any manufacturing residue. Wash the roasting pan and rack with warm, soapy water, ensuring all surfaces are covered. Rinse thoroughly and dry completely. Wipe down the interior and exterior of the oven with a damp cloth.
Resources like the Internet Archive offer manuals for similar Oster models, providing cleaning guidance. Proper cleaning ensures food safety and optimal performance.
Positioning & Electrical Requirements
Proper positioning and adherence to electrical requirements are vital for safe and efficient operation of your Oster 22-quart roaster oven. Place the oven on a flat, stable, heat-resistant surface, ensuring ample space around it for ventilation – at least six inches on all sides.
Avoid placing the oven near flammable materials like curtains or paper towels. This appliance requires a standard 120V AC electrical outlet. Do not use extension cords; if necessary, use a heavy-duty appliance cord. Ensure the outlet is easily accessible for unplugging in emergencies.
Refer to the Oster CKSTRS23-SB manual (available via resources like the Internet Archive) for specific wattage details. Never operate the oven with a damaged cord or plug.
Using the Roaster Oven: Basic Operation
Operating your Oster 22-quart roaster oven is straightforward, offering versatile cooking options. Begin by placing your prepared food inside the roasting pan. Securely position the roasting rack, if using, to elevate the food. Close the lid tightly to retain heat and moisture.

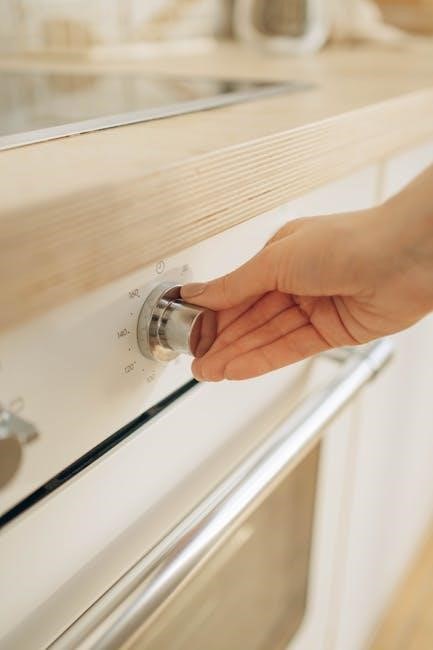
Set the desired temperature using the control knob, referencing the temperature guide for specific foods. The oven will automatically begin heating. Utilize the self-basting feature, if desired, to keep your food moist during cooking.
Regularly check the food’s progress, but minimize lid openings to maintain consistent temperature. Consult resources like the Oster CKSTRS23-SB manual (found on the Internet Archive) for detailed operational instructions.
Temperature Control Settings & Guide

The Oster 22-quart roaster oven features adjustable temperature settings for diverse cooking needs. Typically, settings range from a warm 150°F to a high 450°F. Lower temperatures are ideal for slow cooking and keeping food warm, while higher settings are suited for roasting and baking.
For poultry, a temperature between 325°F and 350°F is recommended. Beef and pork generally require 300°F to 350°F. Baking cakes and desserts usually calls for 350°F. Always consult specific recipes for precise temperature guidelines.
Refer to your Oster CKSTRS23-SB instruction manual (available via the Internet Archive) for a comprehensive temperature chart. Accurate temperature control is crucial for safe and delicious results.
Cooking Times for Common Foods (Poultry, Beef, Pork)
Estimating cooking times in your Oster 22-quart roaster oven depends on the weight of the food and the chosen temperature. A 12-14 pound turkey typically requires 3-4 hours at 325°F. Whole chickens (3-4 pounds) usually cook in 1;5-2 hours at the same temperature.
For pot roast (3-4 pounds), plan for 3-4 hours on low, or 2-3 hours on medium. Larger cuts of beef, like a 5-pound roast, may need up to 5 hours. Pork shoulder (3-4 pounds) benefits from 4-6 hours of slow cooking.
Always use a meat thermometer to ensure internal temperatures reach safe levels. Refer to resources like the Oster CKSTRS23-SB manual for detailed guidelines and safe cooking temperatures.
Using the Self-Basting Feature
The Oster roaster oven’s self-basting feature simplifies moist cooking. Water is heated, creating steam that continuously bastes the food, resulting in juicier results. To use it, pour approximately 1-2 cups of water into the well located inside the oven.
Ensure the water level doesn’t exceed the maximum fill line. The self-basting cycle automatically operates during cooking, but you may need to replenish the water during longer cooking times, like with a turkey.
Refer to your Oster CKSTRS23-SB instruction manual for specific details on the self-basting mechanism and recommended water levels. Consistent moisture is key for tender poultry and flavorful roasts.
Roasting Techniques & Tips
Achieving optimal roasting results with your Oster oven requires a few key techniques. Elevating the food on a roasting rack allows for even heat circulation, promoting crispy skin and preventing sticking. Consider using a meat thermometer to ensure accurate internal temperatures, vital for food safety and desired doneness.
For enhanced flavor, season generously with herbs, spices, and marinades. Basting, even without the self-basting feature, adds moisture and richness. Remember to preheat the oven thoroughly for consistent cooking.
Consult resources like the Oster CKSTRS23-SB manual for specific roasting guidelines and recommended temperatures for various meats. Experiment with different techniques to discover your preferred results!
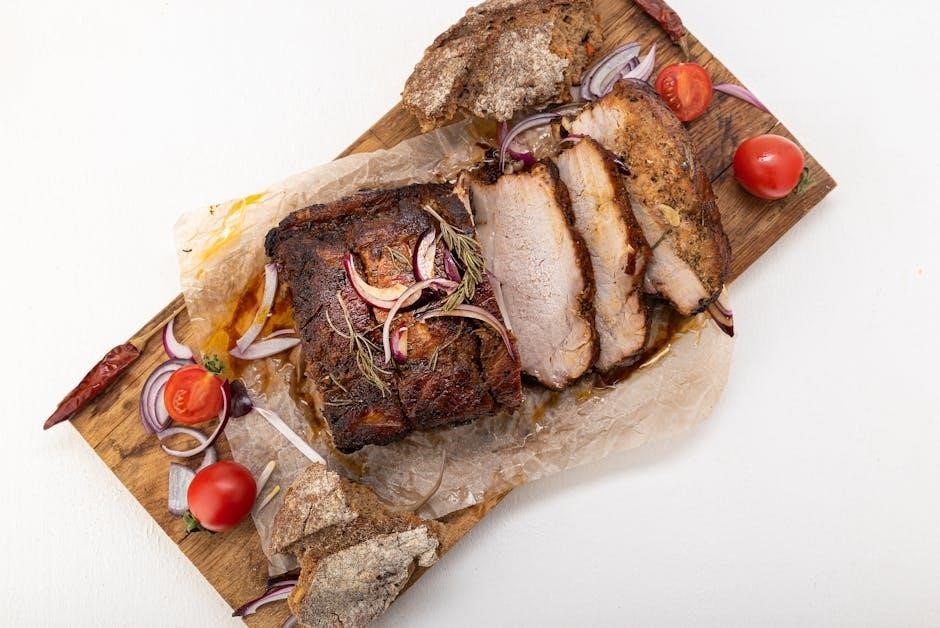
Roasting a Whole Chicken
Roasting a whole chicken in your Oster 22-quart oven is surprisingly simple. Begin by patting the chicken dry and seasoning it generously, inside and out, with your preferred blend of herbs and spices. Place the chicken on a roasting rack within the roaster pan to ensure even cooking and crispy skin.
A typical 3-4 pound chicken will require approximately 1.5 to 2 hours at 325°F (160°C). Utilize a meat thermometer inserted into the thickest part of the thigh, avoiding the bone, to verify an internal temperature of 165°F (74°C).
Basting periodically with pan juices or melted butter enhances flavor and moisture. Allow the chicken to rest for 10-15 minutes before carving and serving – enjoy!
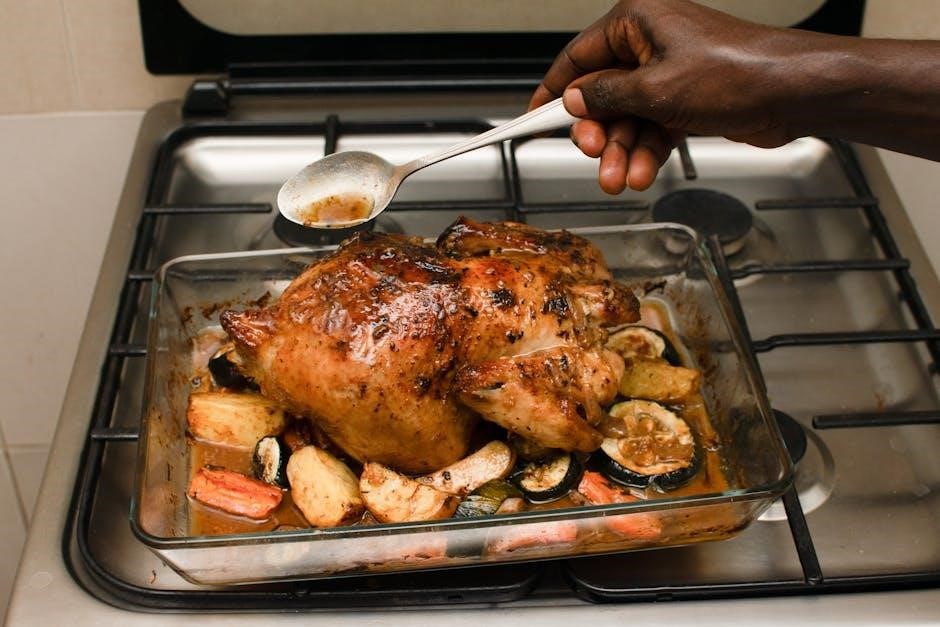
Roasting a Turkey in Your Oster Roaster
Your Oster 22-quart roaster oven is capable of handling a smaller turkey, typically up to 12-14 pounds, making it ideal for smaller gatherings. Ensure the turkey is completely thawed before roasting; allow approximately 24 hours for every 4-5 pounds. Pat the turkey dry and season generously, both under the skin and externally.
Place the turkey on a roasting rack inside the roaster pan. A general guideline is to roast at 325°F (160°C). Cooking time will vary based on weight, but estimate around 3-4 hours for a 12-pound turkey.
Use a meat thermometer to confirm an internal temperature of 165°F (74°C) in the thickest part of the thigh. Basting every 30-45 minutes keeps the turkey moist and flavorful; Let it rest for 20-30 minutes before carving.
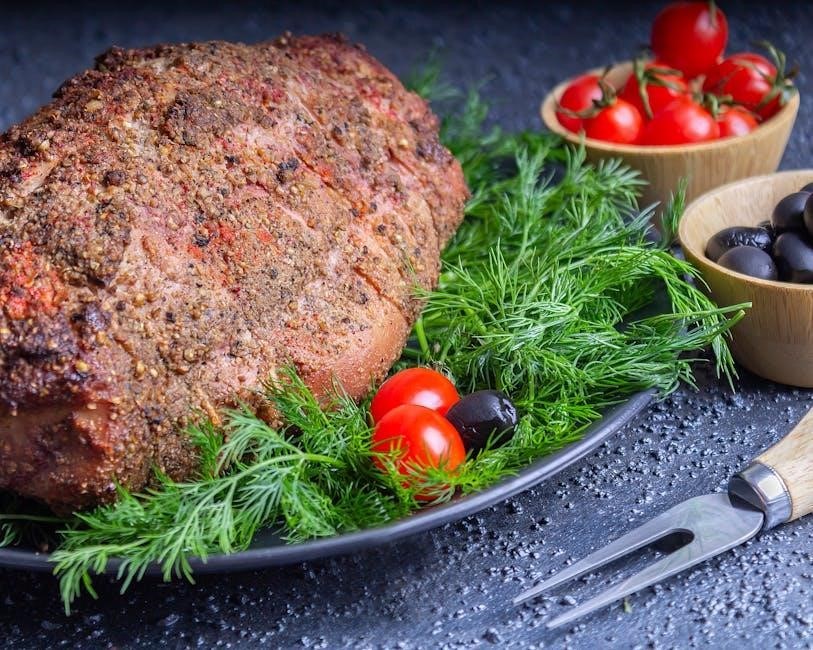
Preparing Pot Roast
The Oster roaster oven excels at creating tender, flavorful pot roasts. Begin by searing a 3-4 pound beef chuck roast on all sides directly in the roaster oven, using the highest temperature setting. This develops a rich, browned crust. Remove the roast and set aside.
Add chopped onions, carrots, and celery to the roaster pan and sauté until softened. Deglaze the pan with beef broth, scraping up any browned bits. Return the roast to the pan, add potatoes, and pour in enough broth to cover about two-thirds of the roast.
Set the roaster to 300°F (150°C) and cook for 3-4 hours, or until the beef is fork-tender. The self-basting feature can be utilized for extra moisture during the long cooking process.
Baking with Your Roaster Oven
Your Oster roaster oven isn’t just for roasting; it’s a versatile baking appliance! While it differs from a conventional oven, it can successfully bake cakes, breads, and desserts. Preheating is crucial – allow ample time for the roaster to reach the desired temperature, typically between 325°F and 375°F (160°C ⏤ 190°C).
Due to the roaster’s shape, baking times may vary slightly. Monitor your baked goods closely, checking for doneness a bit earlier than recipe instructions suggest. Using baking pans appropriate for the roaster’s size is also important for even cooking.
Remember to adjust rack position if available, and consider rotating the pan halfway through baking for uniform browning.
Baking Cakes & Desserts
Creating delicious cakes and desserts in your Oster roaster oven is surprisingly achievable! Start by ensuring your cake batter is well-mixed and poured into a suitable baking pan that fits comfortably within the roaster. A lighter-colored pan promotes even baking. Preheat the roaster to 350°F (175°C) – accurate temperature is key.
Baking times will likely be a bit longer than in a traditional oven, so check for doneness using a toothpick inserted into the center. If it comes out clean, your cake is ready! For delicate desserts like cheesecakes, a water bath can help maintain moisture and prevent cracking.
Allow the cake to cool completely before frosting or serving.
Baking Bread & Rolls
Your Oster roaster oven can also bake beautiful bread and fluffy rolls! The key is creating a steamy environment, mimicking a professional bakery oven. Place a shallow pan of hot water on the roaster oven floor during the initial baking phase to generate steam. Preheat the oven to 375°F (190°C).
For crusty loaves, reduce the temperature slightly after the first 15-20 minutes. Baking times will vary depending on the recipe and size of the bread, but generally expect longer baking times than a conventional oven; Check for doneness by tapping the bottom of the loaf – it should sound hollow.
Allow bread to cool completely on a wire rack before slicing and enjoying!
Using the Roaster Oven for Slow Cooking
The Oster roaster oven excels as a slow cooker, offering a spacious interior for large cuts of meat and hearty meals. Utilize the ‘Warm’ setting, which provides a low and consistent heat ideal for slow cooking. Remember, the ‘Warm’ setting isn’t temperature-controlled, so monitoring is crucial.
For optimal results, begin with browning the meat in the roaster oven before adding liquids and other ingredients. Cover tightly with the lid to retain moisture. Slow cooking times will generally be longer than with a dedicated slow cooker, so adjust recipes accordingly.
Always ensure meat reaches a safe internal temperature before serving.
Slow Cooking Recipes & Guidelines
Explore flavorful slow-cooked recipes with your Oster roaster oven! A classic pot roast benefits from 8-10 hours on the ‘Warm’ setting, yielding incredibly tender results. For pulled pork, allow 10-12 hours, ensuring a juicy and shreddable texture. Consider a hearty beef stew, simmering for 6-8 hours with root vegetables and flavorful broth.
Guidelines: Always use a meat thermometer to verify internal temperature. Add liquids – broth, wine, or water – to at least cover the bottom of the roaster. Avoid lifting the lid frequently, as this releases heat and extends cooking time; Adjust seasoning towards the end of the cooking process.
Experiment with spices and herbs to create unique and delicious slow-cooked meals!
Cleaning & Maintenance
Maintaining your Oster roaster oven ensures longevity and optimal performance. Always unplug the unit and allow it to cool completely before cleaning. Removable parts, like the roasting rack and drip pan, are dishwasher safe for convenient cleaning. For stubborn baked-on food, soak these parts in warm, soapy water.
Interior Cleaning: Wipe the interior with a damp cloth and mild detergent. Avoid abrasive cleaners, which can damage the non-stick coating. The exterior can be cleaned similarly. Ensure all parts are thoroughly dry before reassembling.
Proper storage involves cleaning and drying all components before storing in a cool, dry place. Regular cleaning prevents food odors and buildup.
Disassembling Removable Parts
Before cleaning, safely disassemble your Oster 22-quart roaster oven’s removable components. The roasting rack lifts directly out of the roasting pan, requiring minimal effort. The roasting pan itself easily slides from within the oven cavity. Carefully remove the drip pan, typically located beneath the roasting pan, to access any accumulated drippings.
Handle these parts with care to avoid bending or damaging them. Note how each piece fits together during disassembly; this will simplify reassembly. Refer to the instruction manual diagrams if needed. Ensure the oven is cool and unplugged before attempting disassembly.
Proper disassembly facilitates thorough cleaning and maintenance, extending the life of your appliance.

Cleaning the Interior & Exterior
After each use, thoroughly clean your Oster 22-quart roaster oven’s interior and exterior. Begin by wiping down the exterior with a damp cloth and mild dish soap to remove splatters and grease. Avoid abrasive cleaners, which can damage the finish.
For the interior, after removing the roasting and drip pans, wipe down the oven cavity with a damp cloth. Stubborn food residue may require a paste of baking soda and water; let it sit for a short period before gently scrubbing. Never immerse the oven base in water!
Ensure all surfaces are dry before reassembling and storing. Regular cleaning prevents buildup and maintains optimal performance.
Proper Storage of Your Roaster Oven

To ensure the longevity of your Oster 22-quart roaster oven, proper storage is crucial. Before storing, confirm the oven is completely cool, clean, and dry. Disassemble removable parts – the roasting pan, rack, and drip pan – and store them separately to prevent scratching or damage.
Store the oven in a cool, dry place, away from direct sunlight and extreme temperatures. Consider using the original packaging if available, or wrap the oven in a protective covering like a large plastic bag or bubble wrap. Avoid stacking heavy items on top of the roaster oven.
Keep the power cord neatly coiled and stored with the oven to prevent tangling or damage. Proper storage safeguards your investment for years of reliable use.
Troubleshooting Common Issues
Encountering issues with your Oster 22-quart roaster oven? Here’s a quick guide. If the oven isn’t heating, check the power cord connection and ensure the outlet is functioning. Verify the temperature setting is correct and the timer, if used, is engaged.
Temperature inaccuracies can occur; allow the oven to preheat fully before adding food. If the self-basting feature isn’t working, ensure the water reservoir is filled and properly positioned. Check for any blockages in the basting mechanism.
Consult the full instruction manual for detailed troubleshooting steps and safety precautions. Online resources, like the Internet Archive, may offer additional manuals for similar Oster models.
Oven Not Heating
If your Oster 22-quart roaster oven fails to heat, begin with the simplest checks. First, verify the power cord is securely plugged into a functioning electrical outlet. Test the outlet with another appliance to confirm it’s receiving power.
Next, ensure the temperature control knob is set to the desired cooking temperature and hasn’t been accidentally turned off. Confirm the timer, if utilized, is properly set and hasn’t completed its cycle. A tripped circuit breaker could also be the culprit; check your home’s electrical panel.
Refer to the full instruction manual for detailed safety guidelines and further troubleshooting steps. Resources like the Internet Archive may provide access to additional manuals.
Temperature Inaccuracies
Experiencing temperature inconsistencies with your Oster 22-quart roaster oven? Several factors can contribute to this issue. Allow the oven sufficient preheating time before placing food inside; a cold start can affect initial temperature readings. Ensure the oven door is securely closed during operation, as heat escapes with even a slight opening.
Consider the quantity of food within the roaster. Large volumes can lower the internal temperature, requiring adjusted cooking times. Avoid frequent opening of the door during cooking, as this disrupts the heat cycle. If inaccuracies persist, consult the full instruction manual for calibration guidance.
Online resources, like the Internet Archive, may offer supplemental manuals for troubleshooting.
Self-Basting Not Working
If your Oster 22-quart roaster oven’s self-basting feature isn’t functioning, first verify the water reservoir is adequately filled – but not overfilled – to the designated line. Ensure the reservoir is correctly positioned and securely seated within the oven. Check for any obstructions in the basting mechanism, such as accumulated food particles or debris.
Confirm the oven is operating at a temperature sufficient to activate the self-basting cycle; it typically requires a minimum temperature setting. Inspect the self-basting tray for damage or cracks that might impede water flow. Refer to your instruction manual for specific diagrams and troubleshooting steps.
Resources like the Internet Archive may contain additional manuals offering solutions.
Warranty Information & Customer Support

Your Oster 22-quart roaster oven is covered by a limited warranty against defects in materials and workmanship, typically for a period of one year from the date of original purchase. This warranty does not cover damage resulting from misuse, accidents, or unauthorized repairs. Retain your proof of purchase for warranty claims.
For warranty service or customer support, contact Oster directly through their official website or customer service phone number. Online resources, including the Internet Archive, may offer access to older manuals and potentially contact information. Be prepared to provide your model number and date of purchase when contacting support.
Oster’s customer service can assist with troubleshooting, parts replacement, and warranty claim processing.
Registering Your Product
Registering your Oster 22-quart roaster oven offers several benefits, including proof of purchase in case of warranty claims and access to exclusive promotions and product updates. Registration typically involves providing your contact information, the model number of your roaster, and the date of purchase.
You can usually register your product online through the official Oster website. Locate the product registration section and follow the on-screen instructions. Having your purchase receipt readily available will streamline the process. While not always mandatory, registration is highly recommended.
Registering allows Oster to contact you with important safety information or recall notices, ensuring you have the latest information regarding your appliance.
Contacting Oster Customer Service
If you encounter issues with your Oster 22-quart roaster oven, or have questions not addressed in this manual, Oster’s customer service is available to assist you. Contact options typically include a phone number, email support, and potentially a live chat feature on their website.
Before contacting support, have your model number and purchase date handy. Clearly describe the problem you are experiencing, and any troubleshooting steps you’ve already taken. Oster’s website is the best place to find the most up-to-date contact information.
Be prepared to provide proof of purchase if you are seeking warranty service. Their representatives can guide you through troubleshooting, warranty claims, or provide additional assistance.